Beading, crocheting, clay-making, writing, opinionating... two sisters who do it all!
Translate
Showing posts with label wire. Show all posts
Tuesday, January 14, 2014
Keeping the Muse Satisfied
So, I didn't get to play with my poly-clay this weekend. Too much was going on for me to be abl to do it. HOWsomeEVER! Last night I was able to play with my wire. Yes, my fellow Crazy Creators, I have made my first ever fibula! I am SO proud of me right now, I could bust!!
So! I used the bottom of one of my tool holding buckets to create the initial circular shape, then smoothed the shape slightly with my nylon jawed bracelet forming plyers, then hand tightened the circle. I wire wrapped some faceted, Tanzenite colored crystals to the circle, then created the pin and attached more beads. The pin is (it's been suggested) too long so I have plans to lop off about 1/4" and refile the point. Other than that, I'm happy with it.
Now, why did I choose the beads, etc. that I did? Well, there's a story. I have a series of jewelry called my "Fishes & Loaves" line that is taken from the story in the Bible where Jesus fed the 5,000 with a little boy's donated lunch of five loaves of bread and two small fish. In the past this has mostly been fish-shaped earrings with five beads (3 on one fish & 2 on the other), a couple of bracelets with the fish motif and five beads wired on, and at least one necklace with the fish & beads (which I loved!). This time, I wanted to finish the story. See, after everyone had been fed, Jesus told His disciples to take up the leftovers. They returned with twelve full baskets. Bet that little boy's momma was shocked! (yes, I believe it went to the boy... after all, it was his lunch given to Jesus to use... why wouldn't Jesus reward his generosity?) ANYway, you'll see there's 5 small, purple round beads and two tiny fish on the straight pin. There's the fish & loaves. If you count, you'll find there are 12 beads on the main portion of the fibula... they represent the 12 baskets of leftovers taken up. The end of the story (as it were).
I'm sure this will evolve in other ways (already have an idea or two) so keep watching. After all, my Muse is speaking to me, I must keep her happy!
Tuesday, July 9, 2013
Black & White Challenge Blog Hop
Sally over at The Studio Sublime challenged us to a hop wherein we made jewelry using only the colors of black and white (not counting wire). Y'know, I've got black beads and white beads all over but I've never (except once) sat down with the express purpose of putting them together. So, here's my contribution to her unique (to me, at least) hop challenge:
top to bottom: grayish crystals, milky grey/white
Going for simple with these: the longer pair,
these are major shoulder sweepers! again,
recycled white glass/sea glass from ZnetShows
top to bottom: black bead, end caps from a small
So, that's my contribution to this challenge. Thanks, Sally, for the kick in the pants to get the ol' Muse thinking and creating again. Please visit the other participants to see what they've done!
![]() |
| had some black chiffon that worked beautifully I'm really getting more into mixing in ribbon or fabric into my jewelry. Love it. |
going for the asymetrical style with this pair
It was really difficult not to add in red. I
wanted to SO badly!
top to bottom: grayish crystals, milky grey/white
pearls trapped in a cage-like finding (Michael's)
and black faceted crystal dangles.
Going for simple with these: the longer pair,
I used some cream/white glass pearls from
ZnetShows.com, the wire is copper that I
heated to ball up and dumped in cold water
to cause that rosy pink coloring. (hope it
still falls within the rules!) I did two pair
because I just wanted simple as well as
simple with a touch more elegance.
these are major shoulder sweepers! again,
I used material for the lower part, black and
white batik/African style print from a fan
that broke so I salvaged the cloth. It went
perfect with the round black and white beads.
again, top to bottom: cream/white glass pearls
from ZnetShows, white(ish) man-made blister
pearls, cones from Michaels and inside are a
small black bead, white pearl and larger black bead
(to keep things from pulling up too far into the cone)
recycled white glass/sea glass from ZnetShows
strung with a silver finding and black seed bead.
top to bottom: black bead, end caps from a small
set of vials I decided not to use, white glass beads
white man-made "shell" rounds (Michael's again)
So, that's my contribution to this challenge. Thanks, Sally, for the kick in the pants to get the ol' Muse thinking and creating again. Please visit the other participants to see what they've done!
Sally Russick (HOSTESS)
|
Pam Sears (**YOU ARE HERE**)
|
Thursday, April 25, 2013
AWEsome Earrings!
Leslie from The Gossiping Goddess blog has published a tutorial on how to make macrame earrings over at Art Jewelry Elements.
No, no, wait! I can hear you now; "Oh, Pam, you really ARE the Crazier Sister! Macrame? Really? Not that big a deal."
BUT! Leslie's tutorial is for WIRE macrame! How awesome is THAT!? I've never really wanted to learn macrame.... well, okay, maybe I did just a little.... but NOW? Now I want to run out and immediately start practising with my wire! You just HAVE to go look at what Leslie has published, along with a link for learning the macrame knots if you've never done it before (although, I'm the sort of learner who gets more from pictures and words and Leslie's is perfect!)
Go! Go look!
No, no, wait! I can hear you now; "Oh, Pam, you really ARE the Crazier Sister! Macrame? Really? Not that big a deal."
BUT! Leslie's tutorial is for WIRE macrame! How awesome is THAT!? I've never really wanted to learn macrame.... well, okay, maybe I did just a little.... but NOW? Now I want to run out and immediately start practising with my wire! You just HAVE to go look at what Leslie has published, along with a link for learning the macrame knots if you've never done it before (although, I'm the sort of learner who gets more from pictures and words and Leslie's is perfect!)
Go! Go look!
![]() |
| Oh, isn't Leslie a-MAY-zing?!? |
Friday, April 19, 2013
Done!
Okay, so I finished the necklace last night and I learned a few things:
1) Just because someone says "use fixative spray to set" does NOT mean it works for everything (or else I just have a very heavy hand and don't know it)
2) I will, from now on, let "permanent" marker ink cure/set for 24 hours, then rub it with Renaissance Wax to "fix" it in place.
Honestly, I followed directions on the can for the fixative. I even let it dry for 20 minutes instead of the 15 required. Then, I do what I always do to be sure, I rubbed my thumb (rather hard) over the surface and the "permanent" marker that had just been "fixed" by the spray came off on my thumb.
~DRAMATIC SIGH~
Out comes the Renaissance Wax and to (careful) work I go. In a short time, not only is the whole thing coated, but none of the marker ink came off during the process or after a few hard rubs of the thumb. Since it has in the past, I attribute this to letting the ink set overnight (NOT the "fixative"). As a test, I inked up four more hammered washers and left them overnight. I plan to test them by waxing one (carefully) and seeing if the ink stays put. If so, yay. If not, then it's a combo of the "fixative" and the wax. Fun.
Anyway, here's the finished necklace:
I had no real design in mind when I started this. I just hammered away at the washer to start with. When it was done, and I recalled I need to finish some designs for ZNet Shows, I just felt drawn to the ruddy red-ish, orange-ish color in the carnelian and aventurine. It didn't seem like enough, though, so I dug through my stash until I found the marble composite beads. They're a pink-ish white/cream color with the ruddy red-ish, orange-ish color of the ZNet beads. It was perfect, and their shape echoed the chain and washer. I'll be sending a photo of the design to Bill Zhang shortly. I have more designs to work on, but I don't want him to think I'm not working with the gorgeous beads he's sent me.
Now, moving on slightly, I also tried my hand at turning my Fishes & Loaves earring series into a bracelet. It worked, and it didn't. Here's the (mostly) finished product:
I got the five beads on for the loaves, four wired to the bracelet and one as a dangle by the fish's tail but I was only able to get one fish (the clasp). I need to find a way to add the second fish or it won't be right. I'm also a little worried that there are "snag" trap areas so I think it requires a bit more tweaking. I plan to wear it a few times with various outfits to see if it does snag. Any suggestion will be gratefully received and, likely, tested out. All in all, not completely disappointed in this for a first attempt. Will be checking the tutes I've pinned and bookmarked for bracelet making to see what I can tweak.
And now, off to email Bill.
1) Just because someone says "use fixative spray to set" does NOT mean it works for everything (or else I just have a very heavy hand and don't know it)
2) I will, from now on, let "permanent" marker ink cure/set for 24 hours, then rub it with Renaissance Wax to "fix" it in place.
Honestly, I followed directions on the can for the fixative. I even let it dry for 20 minutes instead of the 15 required. Then, I do what I always do to be sure, I rubbed my thumb (rather hard) over the surface and the "permanent" marker that had just been "fixed" by the spray came off on my thumb.
~DRAMATIC SIGH~
Out comes the Renaissance Wax and to (careful) work I go. In a short time, not only is the whole thing coated, but none of the marker ink came off during the process or after a few hard rubs of the thumb. Since it has in the past, I attribute this to letting the ink set overnight (NOT the "fixative"). As a test, I inked up four more hammered washers and left them overnight. I plan to test them by waxing one (carefully) and seeing if the ink stays put. If so, yay. If not, then it's a combo of the "fixative" and the wax. Fun.
Anyway, here's the finished necklace:
| Full view - haven't decided on a title, yet. Free form carnelian pendent & heat treated red aventurine squares are from ZNetshows.com. Marble composite circles are from Michael's, donut focal is a (former) washer from Lowe's and the clasp is from the button aisle at Joanne's Craft Store. |
| Closer look at the beads |
| Closer look at the focal.... |
| ...and at the clasp. |
Now, moving on slightly, I also tried my hand at turning my Fishes & Loaves earring series into a bracelet. It worked, and it didn't. Here's the (mostly) finished product:
I got the five beads on for the loaves, four wired to the bracelet and one as a dangle by the fish's tail but I was only able to get one fish (the clasp). I need to find a way to add the second fish or it won't be right. I'm also a little worried that there are "snag" trap areas so I think it requires a bit more tweaking. I plan to wear it a few times with various outfits to see if it does snag. Any suggestion will be gratefully received and, likely, tested out. All in all, not completely disappointed in this for a first attempt. Will be checking the tutes I've pinned and bookmarked for bracelet making to see what I can tweak.
And now, off to email Bill.
Monday, April 9, 2012
Pirate Swag!
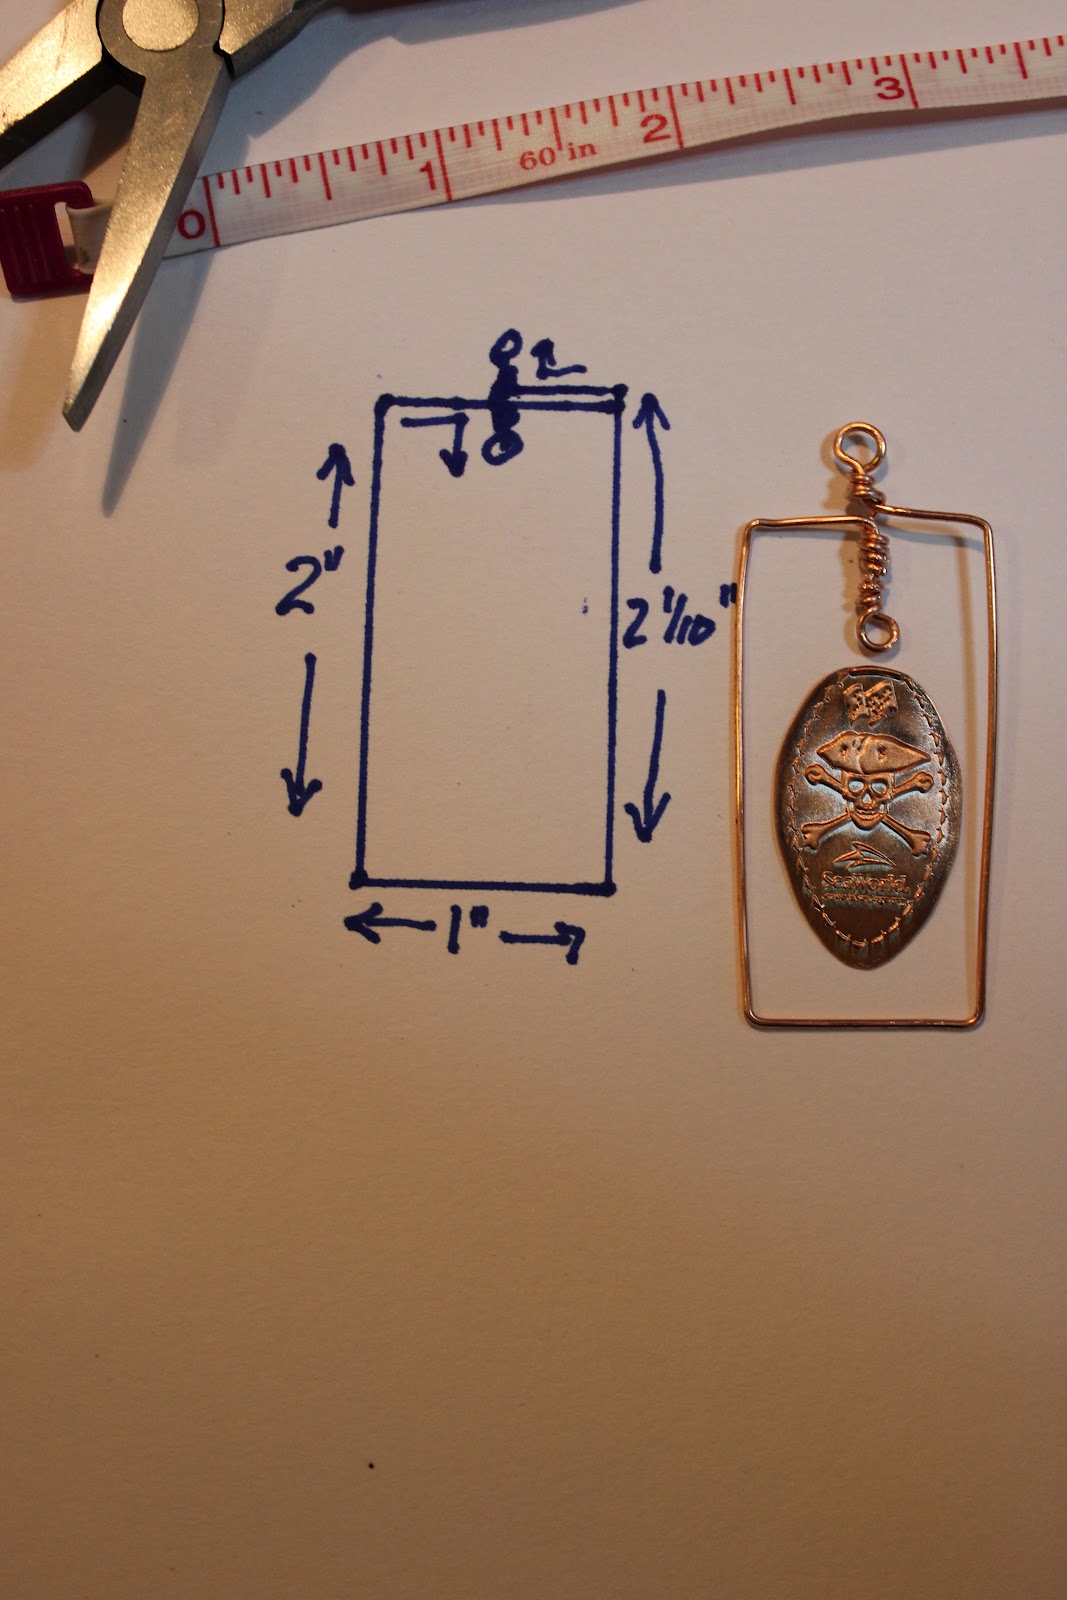
My bestest bud took a trip with her niece and family to Sea World not too long ago and got one of those smashed penny prizes. She showed it to me and I told her I could make a necklace for her if she wanted. Strangely enough, she let me have the penny (eeeeeevil grin!)
So, here it is, from design concept to finish.
| design idea to begin (why keeping sketch book in purse is good!) |
| checking the size of the smooshed penny to the drawn frame |
| 1st measurements |
| revised measurements |
![]() |
| Final incarnation (I won't freak you out with the 1st incarnation ~shudder~) |
![]() |
| Close up of penny in it's frame with the adjustment of it's own little black "pearl" instead of the crystal dangle |
![]() |
| playing around, a metal frame from the measurements |
![]() |
| side view |
Wednesday, March 28, 2012
Hardware Can Be Beautiful
So, I was in Lowe's a few days ago, looking for copper wire and copper tubing (don't ask, I'll show you when it's done!) and I found these sweet little brass mirror holders. My immediate thought was "HEY! I can make these into jewelry somehow!" (y'all have been a really baaaaaaad influence on me!) Anyway, I'm still contemplating what I'm going to do. Any ideas from you?
And, don't forget, my March Contest will be over this Saturday and I'll be drawing two winners shortly thereafter. Go here if you still want a chance to get in on the contest.
| hard to tell the silver color from the brass color in this shot, eh? |
And, don't forget, my March Contest will be over this Saturday and I'll be drawing two winners shortly thereafter. Go here if you still want a chance to get in on the contest.
Monday, March 26, 2012
Pantone Spring ~ Copper Candy Twist
I only had a little time to play with my beads and wires this weekend and that was on Friday night. And that wasn't even until late in the evening! Oh, well, I got to play! Anyway, I decided to play with two of the colors in Patone's list of what's going to be "hot" this spring and to use copper wire to bring it all together. I don't know why copper wire except the beads themselves seemed to just beg for it. They whispered insistently in my head that copper wire was the way to go! (don't look at me like that! you know you ALL have beady little voices whispering to you, too, or you wouldn't be here!)
ANYway, this is what I made Friday night in a fit of creativity: (and, yes, I decided to keep these for myself. LOVE the color mix more than I tho't I would and it's my first real wire work of any kind! eeeeeesoproudpatsselfonback)
| Copper Candy Twist ~ the light orange beads are a tiger's eye sort of bead (not real tiger's eye, but that sort of "movement" in the bead) It's a little richer than the lighting makes it look. |
| The front ~ (do I have to mention the lighting again? plus, it's taken with an iPhone) |
| connector between the dangle/focal and the necklace. (honest! the colors are a little richer than this!) |
| I kept the same colors (the tubes were a dark orange) and pattern throughout |
| Matching earrings |
| close-up of one |
Friday, March 16, 2012
What I'm Up To... Not Much
It's been busy at work this week (got a new system being rolled out) plus our church choir is starting practice for our Easter cantata. Too tired at the end of the day to do more than flip on a light and look at my table before flipping the light back out. Still, I have time to wander through the blogs I stalk follow and get ideas.
They make my fingers itch because I want to try them out!
In fact, I saw one earlier this week where a lady had made a pair of earrings where she'd looped the wires in an interesting way. I can't, for the life of me, find that blog now (and, if I do later, I'll link to it!) so I can't show you what she did (darn it!) but I can show you a little of the influence she had on me. I went home last night and played a bit with my copper wire. Made a couple pairs of earrings and something else I'm pondering making into a necklace focal... we'll see... we'll see...
Now, the copper wire I used isn't craft wire. Oh, no! This is bought-it-at-Lowe's 18gauge copper wire! It's all bright and shiny and just as easy to work with as the stuff you buy in the craft store. Like I said, I made a couple of pairs of earrings but, because I'm at work and only have my iPhone right now, I only have the pair I decided to wear today (I'm keeping these for myself). Here's a couple of pics. Yeah, I left the wire shiny but that's because I don't play with the stuff all you amazing wire and metal smiths play with. I've read about a couple of ways to patina that don't involve liver of sulfer so I may try that on a later set of wires. Until then, :)
They make my fingers itch because I want to try them out!
In fact, I saw one earlier this week where a lady had made a pair of earrings where she'd looped the wires in an interesting way. I can't, for the life of me, find that blog now (and, if I do later, I'll link to it!) so I can't show you what she did (darn it!) but I can show you a little of the influence she had on me. I went home last night and played a bit with my copper wire. Made a couple pairs of earrings and something else I'm pondering making into a necklace focal... we'll see... we'll see...
Now, the copper wire I used isn't craft wire. Oh, no! This is bought-it-at-Lowe's 18gauge copper wire! It's all bright and shiny and just as easy to work with as the stuff you buy in the craft store. Like I said, I made a couple of pairs of earrings but, because I'm at work and only have my iPhone right now, I only have the pair I decided to wear today (I'm keeping these for myself). Here's a couple of pics. Yeah, I left the wire shiny but that's because I don't play with the stuff all you amazing wire and metal smiths play with. I've read about a couple of ways to patina that don't involve liver of sulfer so I may try that on a later set of wires. Until then, :)
| Decided to use the Pantone suggested tangerine. It's a "see-thru" bead so the color doesn't photograph as bright as it really is. Very nice. |
| See? Looks more red than tangerine, but I swear it's tangerine! |
| Silver & copper... I dunno, but I don't have any copper ear wires. Guess I'll have to buy that Renaissance wax to use on future copper wire jobs. |
Tuesday, January 3, 2012
Table-Top Studio Update!
We took my table-top studio set back to the camera store my Mom bought it from and found out it was just a little short in the back of the lamp itself (not the cord). The guy helping us said he had a technician that worked in the store who could very likely fix it if we wanted to try that route first. Well, I'm all for the simple solution. He promised to call us when it was done (this was about 10:30 yesterday morning).
No calls.
All afternoon.
SO bummed. :(
Then, today, I get a message from Mom that the camera store had called her. MY STUDIO LAMP IS FIXED! YAY!! They'll get it for me this afternoon and I can set up some shots again tonight. Woo HOO! Yes! We'll see how things go, now. Hopefully I'll have some creative pics to share soon.
No calls.
All afternoon.
SO bummed. :(
Then, today, I get a message from Mom that the camera store had called her. MY STUDIO LAMP IS FIXED! YAY!! They'll get it for me this afternoon and I can set up some shots again tonight. Woo HOO! Yes! We'll see how things go, now. Hopefully I'll have some creative pics to share soon.
Labels:
antique,
art beads,
bracelets,
brass,
brushed gold,
camera,
fire,
glass,
glass beads,
gold,
jewelry,
necklaces,
photo studio,
photos,
plastic beads,
silver,
torch,
wire,
wire wrapped
Friday, December 23, 2011
CONFESSIONS OF A BEAD-AHOLIC
Yes, I am coming out. It's time to let others know that it's okay to confess to this particular addiction. I'm afraid there's no real cure for it, though. It's the kind of addiction you simply need to continue feeding because, unless you really OD on it, it's never going to go away.
Bead-aholicism.
Yes! I've done it! I've confessed! I am a bead-aholic!!
(whew, what a relief!)
As I said, this isn't anything that can be (or needs to be) "cured." The problem with bead-aholicism is the bead-aholics' inability to pay attention to anything else while beading. This can include (but not be limited to); passage of time, phones ringing, children, spouses, visiting family and/or friends, anything outside of a three foot radius. Sometimes anything within the three foot radius if it's not a bead. Many's the night when I've been beading away and looked up to realize the only light in the house was coming from my lamps on my work table. I hadn't heard the t.v. stop blaring it's show. I hadn't heard anyone heading down the hall to bed. I hadn't even noticed the lights go off. I was in my own little world (but, that's okay, they know me well there!). The other problem is the bead-aholics need for pretty, shiny, all-shapes-and-sizes of beads. If you take a bead-aholic into Michael's or Hobby Lobby be prepared to, a) mop up the drool that will roll down the chin and, b) see them spend an outrageous amount of money on strings of beads and packets of findings that will go perfectly with what they already have.
Why am I confessing to bead-aholicism? Because, I have a regular, 8 to 5 job that takes up the greatest part of my time. I have a 30 minute commute to work and home again (another hour out of my day!) It's 5:30 by the time I get home; that is, if I don't have to stop for fuel or some other errand... or my family doesn't decide we need to eat out instead of cooking. If that happens I don't get home until well after 7pm. And, knowing how I am about beading (disappearing into the art of creating something pretty) I don't like to bead too late in the evening during the week because I won't go to bed early enough to get enough sleep for the next day. I know, I know, there are weekends to work at my craft. Except that's when all the chores and things you weren't able to get done during the week are done. Now what? Huh? Huh? Now? Now you whine and pout and give everyone the "Bambi Eyes" in hopes you'll get (at least) a few hours to sit at your table.
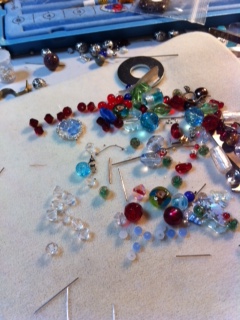
The state of which is another indication of your bead-aholicism. At MY table, I pull out several things at once when I start creating; mixing and matching colors, accents, wire or chain, findings, headpins. And they rarely go back to the boxes and containers they came from so there's a serious mix-mash of all these items strewn about at any given time. I recently read an article over on Art Bead Scene by Erin Prais-Hintz of Treasures Found about making bracelets (or earrings) out of the "left-overs" on your table! How fun! (not to mention a great way to clean up your mes... ahh... table!)
Yes, bead-aholics are an interesting, if misunderstood breed. We're (mostly) harmless (unless there's a major sale at Michael's or Hobby Lobby then, LOOK OUT!), and we really don't mean to ignore you. Just understand we're on an entirely different planet than you when creating. But, that's okay. In fact, we won't mind at all if you want to come visit us there!
Wednesday, November 16, 2011
VIRTUAL CRAFT SHOW ~ SNEAKING UP ON US!
Yes, folks, the First Annual Virtual Craft Show is almost upon us, hosted by Lori Anderson at Pretty Things. It's been sneaking closer and closer and now we have just a little over a week and a half left until it's time to hop from blog to blog and shop to shop to see what all is for sale. Christmas gifts galore! Treats for your sisters, cousins, mothers, aunts, granmas... and, I'm sure there will even be some manly items available. It's like an electronic treasure hunt, you just follow the links and do a little digging and who knows what sorts of baubles you might come up with. There are some real gems out there (pun FULLY intended!)
Shoot, forget the other women in your family. Buy for yourself! (like a friend of mine did... her poor grandaughter has no idea what she didn't get! hahaha!)
Pre-sale treat-peek of some of what will be available on my Etsy Store!
Shoot, forget the other women in your family. Buy for yourself! (like a friend of mine did... her poor grandaughter has no idea what she didn't get! hahaha!)
Pre-sale treat-peek of some of what will be available on my Etsy Store!
Christmas Cheer - beads are handmade lampwork bySue of Sue Beads |
| Golden Tears ~ wire wrapped gold beads on hand made ear hooks |
| Support Spina Bifida line ~ Watch with deep purple and yellow beads and bicon crystals - 8" lgth |
| Autumn Sunset ~ chocolate ribbon with caramel colored oval beads, copper spacers and a sunset colored glass focal. |
| Earth's Wheels ~ earth-tone mottled beads on brass chain, handmade ear wires. |
Subscribe to:
Posts (Atom)