Beading, crocheting, clay-making, writing, opinionating... two sisters who do it all!
Translate
Showing posts with label bread. Show all posts
Tuesday, January 14, 2014
Keeping the Muse Satisfied
So, I didn't get to play with my poly-clay this weekend. Too much was going on for me to be abl to do it. HOWsomeEVER! Last night I was able to play with my wire. Yes, my fellow Crazy Creators, I have made my first ever fibula! I am SO proud of me right now, I could bust!!
So! I used the bottom of one of my tool holding buckets to create the initial circular shape, then smoothed the shape slightly with my nylon jawed bracelet forming plyers, then hand tightened the circle. I wire wrapped some faceted, Tanzenite colored crystals to the circle, then created the pin and attached more beads. The pin is (it's been suggested) too long so I have plans to lop off about 1/4" and refile the point. Other than that, I'm happy with it.
Now, why did I choose the beads, etc. that I did? Well, there's a story. I have a series of jewelry called my "Fishes & Loaves" line that is taken from the story in the Bible where Jesus fed the 5,000 with a little boy's donated lunch of five loaves of bread and two small fish. In the past this has mostly been fish-shaped earrings with five beads (3 on one fish & 2 on the other), a couple of bracelets with the fish motif and five beads wired on, and at least one necklace with the fish & beads (which I loved!). This time, I wanted to finish the story. See, after everyone had been fed, Jesus told His disciples to take up the leftovers. They returned with twelve full baskets. Bet that little boy's momma was shocked! (yes, I believe it went to the boy... after all, it was his lunch given to Jesus to use... why wouldn't Jesus reward his generosity?) ANYway, you'll see there's 5 small, purple round beads and two tiny fish on the straight pin. There's the fish & loaves. If you count, you'll find there are 12 beads on the main portion of the fibula... they represent the 12 baskets of leftovers taken up. The end of the story (as it were).
I'm sure this will evolve in other ways (already have an idea or two) so keep watching. After all, my Muse is speaking to me, I must keep her happy!
Wednesday, June 12, 2013
A Little More Work Last Evening
I was able to sit down for a little while last night, after work, and make a few things. Hope you enjoy:
And, for those who want to enter my magazine destash giveaway, go here.
| Fishes & Loaves Asymmetrical Dangles copper & green seed beads plus the new way I'm curving in the tails. Seems to work! |
| Fishes & Loaves Bracelet Lapis-blue beads (not sure if real or just made to look real) Copper wire and short bits of necklace chain. I'm going to play with several designs before I settle on one. |
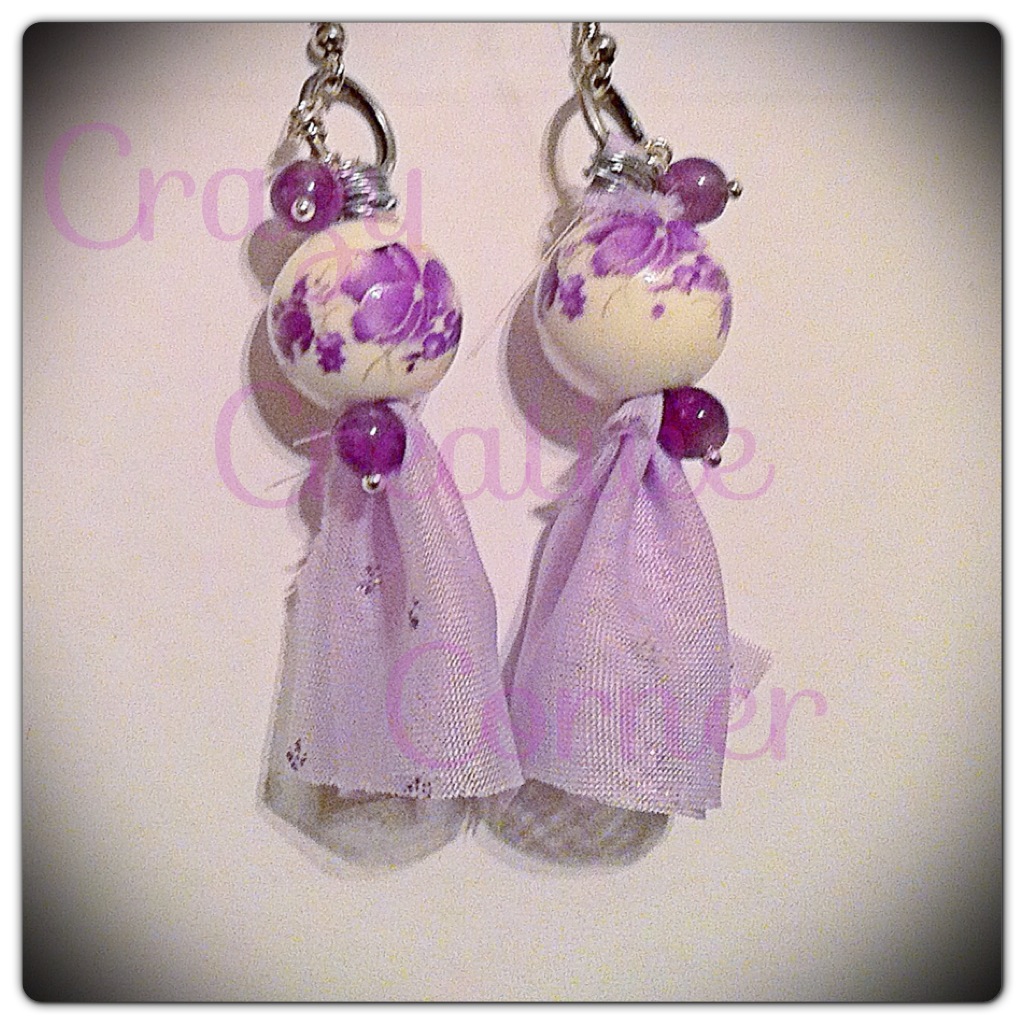
| Summer Iris Again with the earring style learned from Kristi Bowman's Aladdin's Lamp earring tute but using my own little twist. This time I added a couple beads, top & bottom, as accents and I used lavender tulle instead of ribbon. |
Labels:
asymmetrical,
blue,
bracelet,
bread,
dangles,
design,
earrings,
fish,
iris,
lapis,
lavendar,
loaves,
purple,
seed beads,
silver,
summer
Friday, April 19, 2013
Done!
Okay, so I finished the necklace last night and I learned a few things:
1) Just because someone says "use fixative spray to set" does NOT mean it works for everything (or else I just have a very heavy hand and don't know it)
2) I will, from now on, let "permanent" marker ink cure/set for 24 hours, then rub it with Renaissance Wax to "fix" it in place.
Honestly, I followed directions on the can for the fixative. I even let it dry for 20 minutes instead of the 15 required. Then, I do what I always do to be sure, I rubbed my thumb (rather hard) over the surface and the "permanent" marker that had just been "fixed" by the spray came off on my thumb.
~DRAMATIC SIGH~
Out comes the Renaissance Wax and to (careful) work I go. In a short time, not only is the whole thing coated, but none of the marker ink came off during the process or after a few hard rubs of the thumb. Since it has in the past, I attribute this to letting the ink set overnight (NOT the "fixative"). As a test, I inked up four more hammered washers and left them overnight. I plan to test them by waxing one (carefully) and seeing if the ink stays put. If so, yay. If not, then it's a combo of the "fixative" and the wax. Fun.
Anyway, here's the finished necklace:
I had no real design in mind when I started this. I just hammered away at the washer to start with. When it was done, and I recalled I need to finish some designs for ZNet Shows, I just felt drawn to the ruddy red-ish, orange-ish color in the carnelian and aventurine. It didn't seem like enough, though, so I dug through my stash until I found the marble composite beads. They're a pink-ish white/cream color with the ruddy red-ish, orange-ish color of the ZNet beads. It was perfect, and their shape echoed the chain and washer. I'll be sending a photo of the design to Bill Zhang shortly. I have more designs to work on, but I don't want him to think I'm not working with the gorgeous beads he's sent me.
Now, moving on slightly, I also tried my hand at turning my Fishes & Loaves earring series into a bracelet. It worked, and it didn't. Here's the (mostly) finished product:
I got the five beads on for the loaves, four wired to the bracelet and one as a dangle by the fish's tail but I was only able to get one fish (the clasp). I need to find a way to add the second fish or it won't be right. I'm also a little worried that there are "snag" trap areas so I think it requires a bit more tweaking. I plan to wear it a few times with various outfits to see if it does snag. Any suggestion will be gratefully received and, likely, tested out. All in all, not completely disappointed in this for a first attempt. Will be checking the tutes I've pinned and bookmarked for bracelet making to see what I can tweak.
And now, off to email Bill.
1) Just because someone says "use fixative spray to set" does NOT mean it works for everything (or else I just have a very heavy hand and don't know it)
2) I will, from now on, let "permanent" marker ink cure/set for 24 hours, then rub it with Renaissance Wax to "fix" it in place.
Honestly, I followed directions on the can for the fixative. I even let it dry for 20 minutes instead of the 15 required. Then, I do what I always do to be sure, I rubbed my thumb (rather hard) over the surface and the "permanent" marker that had just been "fixed" by the spray came off on my thumb.
~DRAMATIC SIGH~
Out comes the Renaissance Wax and to (careful) work I go. In a short time, not only is the whole thing coated, but none of the marker ink came off during the process or after a few hard rubs of the thumb. Since it has in the past, I attribute this to letting the ink set overnight (NOT the "fixative"). As a test, I inked up four more hammered washers and left them overnight. I plan to test them by waxing one (carefully) and seeing if the ink stays put. If so, yay. If not, then it's a combo of the "fixative" and the wax. Fun.
Anyway, here's the finished necklace:
| Full view - haven't decided on a title, yet. Free form carnelian pendent & heat treated red aventurine squares are from ZNetshows.com. Marble composite circles are from Michael's, donut focal is a (former) washer from Lowe's and the clasp is from the button aisle at Joanne's Craft Store. |
| Closer look at the beads |
| Closer look at the focal.... |
| ...and at the clasp. |
Now, moving on slightly, I also tried my hand at turning my Fishes & Loaves earring series into a bracelet. It worked, and it didn't. Here's the (mostly) finished product:
I got the five beads on for the loaves, four wired to the bracelet and one as a dangle by the fish's tail but I was only able to get one fish (the clasp). I need to find a way to add the second fish or it won't be right. I'm also a little worried that there are "snag" trap areas so I think it requires a bit more tweaking. I plan to wear it a few times with various outfits to see if it does snag. Any suggestion will be gratefully received and, likely, tested out. All in all, not completely disappointed in this for a first attempt. Will be checking the tutes I've pinned and bookmarked for bracelet making to see what I can tweak.
And now, off to email Bill.
Tuesday, April 16, 2013
A Clean(er) Studio & More Fishes-n-Loaves
I am one who creates in the midst of chaos. I pull out beads from here, and findings from there, and wire/chain from the other place and just play until a design seems to shape itself. Sadly, I have a hard time putting the leftovers back where I found them. I tend to leave them out because, hey, they sparked one idea already they might cause another one!
But, even I finally couldn't take it anymore. I picked up the bigger pieces, moved things around to get at the smaller pieces, and swept the lot of them into a large bowl I usually have water in to quench my metal work.
Then it sat there, all forlorn, for two days while I worked up the nerve to finish cleaning without stopping to play. So, here's a few shots of the clean(er) studio:
It's actually even cleaner than what's pictured but I doubt it'll last long! (hahHA!)
After finally getting the worst of it cleaned up (yes, there's still somewhat of a mess there), I sat down and began banging on some washers. Those are still in the "Come-Along" process and I will show you when they're ready. I will tell you I'm using more beads from Bill @ ZNetShows.com in the design.
BUT!! Since it's not nice to tease, (usually ~snerk~) I will show you some pics of the earrings I made while my metal was tumbling. I'm still working to refine (and, I hope, expand) my Fishes & Loaves series. Here are the earrings I made this past weekend:
Sorry for the blur on any of the pics. Low light and iPhone cameras don't always cooperate. My next piece will be (I hope!) a bracelet incorporating the fish sign and the beads. Check back, I'll let you know if it worked ;)
But, even I finally couldn't take it anymore. I picked up the bigger pieces, moved things around to get at the smaller pieces, and swept the lot of them into a large bowl I usually have water in to quench my metal work.
Then it sat there, all forlorn, for two days while I worked up the nerve to finish cleaning without stopping to play. So, here's a few shots of the clean(er) studio:
| The "main" area, table with drawers (you can get them at Lowe's!) and you can see the bits & wood support for my drill along with various boxes for other equipment underneath. |
It's actually even cleaner than what's pictured but I doubt it'll last long! (hahHA!)
After finally getting the worst of it cleaned up (yes, there's still somewhat of a mess there), I sat down and began banging on some washers. Those are still in the "Come-Along" process and I will show you when they're ready. I will tell you I'm using more beads from Bill @ ZNetShows.com in the design.
BUT!! Since it's not nice to tease, (usually ~snerk~) I will show you some pics of the earrings I made while my metal was tumbling. I'm still working to refine (and, I hope, expand) my Fishes & Loaves series. Here are the earrings I made this past weekend:
Sorry for the blur on any of the pics. Low light and iPhone cameras don't always cooperate. My next piece will be (I hope!) a bracelet incorporating the fish sign and the beads. Check back, I'll let you know if it worked ;)
Labels:
aluminum,
beads,
bread,
cleaning,
copper,
craft,
craft room,
crafts,
create,
creativity,
diy,
earrings,
fish,
jewelry,
seed beads,
silver,
studio
Saturday, November 24, 2012
Copper, Copper, LOVING My Copper!
So, this weekend (starting with Friday afternoon) I got out more of my copper and played with it. If you want to see the post I did about my first-ever headpins, go here. If you want to see the post I did for pickle (for cleaning fire-scale from your pins), go here. I had previously gone to Target and found the cutest little 2qt crock pot for $11.00 and bought it for making my pickle. Just like you need a dedicated oven with Poly-clay, you need a dedicated pot for your metal pickle. You never want to use something you would ever consider using at a later date for food. Always keep these tools separate.
I also have a pair of long, flat-nosed pliers that I use specifically for firing my copper.
I also got brave and made a few double-ended headpins:
then I heated up some bits of copper I had plans to use in making earrings:
Next, I covered over both sides with black permanent marker and, once it dried, sanded it off so only the marks left in the metal were darkened. Then I punched four holes in them, one at the top and three at the bottom and hung beads and headpins. Here's the final results:
Here are several others I made this weekend, too:
So... that's been my weekend. What about yours?
![]() |
| isn't it just adorbs!? |
![]() |
| Nice, almost completely clean copper. What little fire-scale is left came off easily with my sponge file (which you can get from you local beauty supply store) |
![]() |
| awesome! |
Next, I covered over both sides with black permanent marker and, once it dried, sanded it off so only the marks left in the metal were darkened. Then I punched four holes in them, one at the top and three at the bottom and hung beads and headpins. Here's the final results:
![]() |
| SQUEE! I plan to keep these as they're my first ever pair! aweSOME! |
![]() |
| Fishes & Loaves in rustic red: this pair is just under 2" in length |
![]() |
| less rustic & in white: also just about 2" in length... going to make more pairs on this smaller scale as well as the 2 1/2-3" length earrings |
![]() |
| all together, now..... |
![]() |
| snow crystals |
![]() |
| ruby zoisite ~ rough |
Labels:
beads,
bread,
chain,
copper,
earrings,
fish,
green,
hand made,
hand stamped,
headpins,
jewelry,
red,
ruby,
seed beads,
stones,
tribal,
white
Subscribe to:
Posts (Atom)