Translate

Friday, November 30, 2012

Just A Break... And A Couple Pics

I'm still working my way through the Challenge of Color blog hop (if you're looking for mine, go here) but I'm going to stop for a bit. It's overwhelming what gorgeousness everyone has come up with in response to to Erin & Brandi's challenge. And I love seeing how some of us can get the same pallets and still be SO different in what and how we see and create! 

As for the promised pics, on my way home from my Day Job today (I work in what amounts to the boonies!) I saw a couple of hawks sitting atop phone poles. Not sure which type of hawk , but I suspect Golden Hawk (only because that's one of the more prevalent species along with the Kite Hawk, but these boys were too big for that).  They looked over at me when I stopped my car to get out and get a shot (I drag my camera almost EVERYwhere anymore... just in case...!) then, after I'd gotten off one shot of the 1st hawk and about 2 or three of the 2nd one, they took off. Guess they didn't like being "shot" at. (that's a pun, y'all.... laugh!) Anyway, I came home, cleaned 'em up and played with 'em a bit on picmonkey.com and here's what I have. May put these on the Etsy store when I reopen.  We'll see. I'm SO seriously considering a photo section in the store, too.

Anyway, enjoy these lovelies:

"Watching My Back"

"Suspicious..."

Same as the one right above, but a little closer look
He flew off right after this and I'm not good enough to
follow that fast of an action that up close, yet. I'll get there!
Be back tomorrow, late, to check out some more of the Challenge Of Color entrants.

Challenge Of Color ~ From SPACE!


Erin from over at Treasures Found teamed up with Brandi of brandigirlblog to challenge us with some seriously amazing color pallets.  Erin sent each participant a choice of two pallets of this amazing Earth as taken from space and used in The Earth As Art Project.  It's seriously awesome to see!  The two Erin sent me where just.... mmmmm!  Here's what I received for my choices:


Aren't these some crazy amazing color combos?  I saw them and sighed and told Erin to just put me down for both (after I said I wasn't going to do any more until 2013 got here!) 

Well, those of you who follow me have learned by now that I'm am QUEEN when it comes to procrastinating!  Oh, I had beads and bits and bobs I was playing with, and ideas floating about in the ol' noggin', but I wasn't getting anywhere too fast.  And, then, (*gulp!*) it was WEDNESDAY NIGHT and I realized there was NO TIME left. I had to sit my Queenly Procrastinating Butt DOWN and put my challenge together!  And I did!  I even stepped outside my comfort zone a little (but, I'll get to that in a minute!)  So, with no further ado, here are my Challenge of Color/Earth As Art pieces. 1st, Meighen Island inspiration:

And here's where I stepped out of my comfort zone:
I used leather cording to hang my necklace design!

I had this focal bead lying in a drawer, just
begging to be used in this challenge. I loved
the touches of gold swirled with the blue & white.
I coiled some copper and pinched it into the
leather, then hung a briolet from it. The briolets
were, again, a perfect match to the colors Erin
gave me (same on both sides)

And, of course, can't make a necklace
without earrings (at least, *I* can't!)
Spent brass shell casings mixed with
silver and steel wires. The brass is untreated
so will darken with age & exposure. Nice.
And, the second one, the Namib Desert. For this, I only made a pair of earrings. As I said, I'm a procrastinator... but I'm NOT sloppy! I'd rather make a few items, well, in a short time than as many as I can and they fall apart if someone touches them! My desert inspired earrings:

I used the gift certificate I received from
Erin's last little ballyhoo and bought amber
chips... and they came today! Serendipity?
because I didn't mean it to happen that way!
Anyway, I used them to give the earrings
a bit more swing  and added a bluey/green
seed bead for the smallest bit of color
(still playing with copper!)

Slightly closer look. Sorry for any
blur, iPhones aren't meant for extreme
close-ups. I annealed the copper and then
hammered it over a coin. I'm not thrilled
with the results (need a better coin) but
I am happy with them. I'm learning!
And that conclued today's tour of my Earth As Art inspired jewelry.  Please, pop over to Erin's blog to see everyone else's links and tour their Earth/Art Inspired creations. (for some reason, I couldn't get the links to copy here... frustrating because they usually do! grrr!)

Wednesday, November 28, 2012

Fire Painting Copper

I am now SO enthused with copper and fire (I think I've already admitted to pyromanic tendencies) that I'm ready to really play with my torch and metals this weekend.  I've been looking at how to "paint" the copper using my torch and found two pretty interesting sites.

The first one, by John Searles, looks like it's for a larger torch than I use, but I'm going to experiment anyway since what I'm wanting to "paint" are much smaller pieces of copper than he appears to be referring to. Still, I plan to practise with the salt & baking soda recipe for a red patina. I've got so many ideas bouncing around in my head right now!  If you want to see John's explanation for patinaing with fire, go over to Metal Patinas & Coatings to check it out. (he uses other things than fire to get interesting patinas!)


Jen's "design" by moving
the torch in and out
 Then there's a post by Jen Lowe Designs that has a few interesting points.  In this post (from 2007) she's just starting to play/experiment with copper & fire.  And, that's one of her best pieces of advice; excepting the rules of safty, toss the rest of the "rules" for "painting" with a torch and just play!  Her article can be found on this page of Jen Lowe Designs and it's fun and interesting.

I'll keep y'all updated on what happens with my playing around (and hope that no firemen were called in the execution of these experiments.... unless he's really cute.... and planning to ask me out....)

Saturday, November 24, 2012

Copper, Copper, LOVING My Copper!

So, this weekend (starting with Friday afternoon) I got out more of my copper and played with it.  If you want to see the post I did about my first-ever headpins, go here.  If you want to see the post I did for pickle (for cleaning fire-scale from your pins), go here.  I had previously gone to Target and found the cutest little 2qt crock pot for $11.00 and bought it for making my pickle.  Just like you need a dedicated oven with Poly-clay, you need a dedicated pot for your metal pickle.  You never want to use something you would ever consider using at a later date for food.  Always keep these tools separate. 
isn't it just adorbs!?
I also have a pair of long, flat-nosed pliers that I use specifically for firing my copper. 
Look close at the tips, near the arrow, you can see the
fire-scale on the tips. Kobalt is an excellent brand for
working with jewelry. I have two pairs of these pliers,
one for fire work and one for wire work. Available at Lowe's.
I used the 1:1 ratio (1 cup vinegar to 1 tbsp salt, I used Kosher... no reason, just chose it) and heated the crock pot on "High" until it was warmed up then turned it to "Low."  Be aware, this is a sharp smell whenever you open the lid! Once I had balled up several pins and dropped them in the water to cool off, I popped 'em in the pickle for about 15 mintues.  Here's what I got back:

Nice, almost completely clean copper.  What little fire-scale
is left came off easily with my sponge file (which you can
get from you local beauty supply store)
I also got brave and made a few double-ended headpins:

awesome!
then I heated up some bits of copper I had plans to use in making earrings:

The fire-scale is almost completely gone! Only a little elbow
grease with my sponge file and they were ready to be turned
into earring components! by the way, you can look at the blue
arrow in the upper right and see the pickle solution being
absorbed by the paper towel.  It's been used a few times and
is already changing color.  Cool!
My next problem was to turn the rectangles into some sort of earring component. I am determined to make more of my own components. After cleaning the remaining fire-scale, I pounded the rectangles randomly with the peen end of my hammer, with another instrument that I don't remember what it's called but it can be used to make small, round marks/divots in metal and with a .22 shell casing.

Next, I covered over both sides with black permanent marker and, once it dried, sanded it off so only the marks left in the metal were darkened.  Then I punched four holes in them, one at the top and three at the bottom and hung beads and headpins.  Here's the final results:

SQUEE!  I plan to keep these as they're
my first ever pair! aweSOME!
Here are several others I made this weekend, too:
Fishes & Loaves in rustic red:
this pair is just under 2" in length
less rustic & in white: also just about
2" in length... going to make more
pairs on this smaller scale as well as
the 2 1/2-3" length earrings
all together, now.....
snow crystals
ruby zoisite ~ rough

So... that's been my weekend. What about yours?

Wednesday, November 21, 2012

Playing with My Canon....

....and PicMonkey.  Really like playing with PicMonkey (maybe it's the name? how fun is it to say! picmonkeymonkeymonkey!)
Anyway, here's what I had fun with! :)

~Angled~

~Crooked~

~Grape Leaf Fall~

~November Sky~

~Lunch Truck Meeting~

~The Trail~

~Twilight Tree~

~Handsfree~
Just having fun around work, really loved that sunset when I walked out of work last night. Hope you enjoyed it, too.

Happy, Happy Turkey Day...

.... 0_o  Uhm, well, I don't remember the rest of that "song" from "The Aadams Family Values" but I loved the scene!  So, in honor of Wednesday & Pugsley Aadams, Happy Turkey Day to you and your (erm..) "loved" ones (mwuaaaahahahahaaaaa)


keep an eye on the kids!


...and don't overcook the turkey!


Friday, November 16, 2012

Rain, Rain... Actually, Come Around!

I live in the San Joaquin Valley area of California.  We're listed as "Central" California but, if you look at a map, my city is really much closer to being in the "Southern" area (at least, in my opinion!). We're in the southern end of the SJ Valley which puts us in a horseshoe of mountains East, South & West.  We not only get agricultural smog from all the farming in our area but all the smog from cities as far north of us as San Francisco and it's trapped by those aforementioned mountains.  (sigh)

But, when it rains, I mean actually, really, truly, water-falling-from-the-sky rains, it washes all that out of the air and it's gorgeous. The smell of clean earth.  The scent of watered down Nature. Mmmmm! And the view! Wow!

I say all that to tell you this: at my Day Job, today, we were all told to park outside the parking lot because they were going to re-pave it for us.  I took a picture because it just cracked me up to see this big, empty lot with all the employee's cars outside the fence "looking in" as it were.


Now, about an hour after we got to work, we were told the folks who were going to do the re-pave job had decided to call it off on account of the fact it might rain today.  See the clouds?  Yeah... now, if I were still in Pensacola, FL (where I went to college) I'd be almighty worried. I'd be saying, "Oh, yeah, gonna really pour today! Keep the bumbershoot handy!"  But, here?  I look up and think, "Well, we might get enough rain to make it look like someone sneezed really hard. Maybe."

Don't get me wrong, it does rain here.  However, the joke goes like this; a visitor once asked a native how much rain we got per year and the native said "6 inches."
"Wow!" says the visitor. "That's not very much!" 
"Yeah? Well," the native drawls. "You should be here the day we get it!"

 Yes, it will probably drizzle sometime tonight (I'm sorry, after college, I just can't call most of what we get "rain!"), but enough to call off a re-pave job?

Aw, c'mon you big pansies! 

Thursday, November 15, 2012

Copper Wire and A Lack of Ruby

So, for those who have read my last couple of posts on my adventures in pyromania torching headpins from copper wire, I mentioned I found the wire at Lowe's. At least one person asked where, at Lowe's, did I locate said wire?  Well, I can't tell you. 

No, no, don't misunderstand.  I know where to go at my Lowe's; I just walk in, hook a left and head straight for the aisle I know holds my wire.  But I can't give you an aisle number or section or anything like that. I initially just wandered the aisles until I found what I wanted.  What I can do for you is show you a picture of the wire I use and give you an on-line link to it. That way, you can either print the picture and ask the nearest sales person for help or simply order it on-line at Lowes.com.


Sorry, my mistake, NOT 24g, it's 18g wire. Still works!
...as for Ruby.... either she's mad at me and not talking (couldn't come up with one single funny thing this week from her!) or she's busy reading the back story to Schlock Mercenary.

Somehow, I get the feeling it's the latter.  If you like on-line comics (I admit to an inner geek!) Schlock can tickle your funny bone. Warning, it's addictive. Reading it from the beginning (and seeing the difference in skill level as the artist progresses to the present) is time consuming but a) worth it and, b) addicting! I'm not kidding! Do NOT start reading it just before bed-time or you will be up all night trying to catch up to the present story arc! (which, like I said, I'm pretty sure happened to Ruby. She's got a warped sense of humor, which is probably why she talks to me from time to time ~hee~ )


note: Schlock and all related characters are the sole property
of Howard Tayler. I have no desire to see the Glow of Doom
because I forgot to mention property rights or because I did
some fan art.  For your own viewing pleasure, go here to read
Schlock Mercenary - The Comic Space Opera by Howard Tayler
(and, really, start at the beginning!)


Tuesday, November 13, 2012

Sharing The Knowledge

I put up pics of my copper headpin success on FB and asked if anyone had any recipes for homemade pickle solution (still not the Vlasic pickle juice!). I received a wealth of responses and thought I'd share them with those of you who mentioned also wanting to expand into metal work.  So, here goes:

Items you will need:
small, dedicated crock pot (I wouldn't use it for ANYthing else!) (a ceramic pot is best, apparently the acid won't eat through glass but will through metal after awhile... interesting)
tongs (copper or wood so as not to contaminate the pickle)
brass brush, fine sandpaper or an emery board/file
glass bowl

Items you will need for the homemade version:
all of the above plus:
white vinegar
sea salt
citric acid & water (only if you don't use the vinegar/sea salt solution)

The first is from a blog called Jewelry Studies Intl and is for homemade pickle. This one mentions cleaning Argentium, so I'm not sure about the copper pins, but I believe it will be okay because several ladies on FB mentioned citric pickling solutions. Try it on scrap copper, first, if you aren't sure.  Or, if you're more chicken than me, wait and check back here. I plan to test drive it myself. I'll let you know!

Etsty also has wonderful bloggers that give solutions to questions of how to...?  If you don't have a crock pot, but you're a mom who now has a toddler who no longer needs a bottle and you just so happen to have a bottle warmer on hand, this is a great solution for heating your solution: Etsy metal Blog

The blog, I Dream I Can Fly also goes the vinegar/salt route (go here to check her out) so I do believe this is a good recipe to try.  The only "disagreement" I see is some have 1 TBSP salt to every 1 cup of vinegar, vs. 3 c vinegar & 2 TBSP salt.  There may be some experimentation required here, but it's close so I think I'd go the 1:1 route on this.  They also all agree that you want it heated (hence the crock pot). There's also the added caveat that pickling solution will remove any rose color from your copper so either create a set up that will only dip the pin part, not the balled up part or just put some serious elbow grease into getting the fire scale off without the pickle solution. Just still be careful, going over the rose color with sandpaper or an emery board will also remove the color and return it to just plain copper.

Another pickle solution is citric acid and vinegar; 1/2 cup citric acid to a 1/2 gallon of water (or scale to size as needed) and heat in a crock pot (obviously a necessary tool!).

All these homemade pickles will keep awhile, I'm told, stored in an airtight container when not in use.  You'll know to replace them when they turn a lovely green from either the copper (which, it's been suggested, this could be saved and used as a plating solution if you're into that) or when it grows an equally lovely mold.... Uhm, ew!  Time to start over with fresh pickle!

However, if you'd rather go the route of buying your pickle, here are a couple sites that sell it ready-made:
Rio Grande Jewelry Making Supplies
Santa Fe Jewelrs Supply

And that's what I have to share for today.  If you have any other suggstions, recipes or blogs you'd like to share, please feel free to post 'em in the comments.

And, remember, wade in slowly. We're working our way up to that Freestyle swim. No cannon balls in this pool, please!

Sunday, November 11, 2012

Playing with Copper & Fire

I admit it, I'm a big coward! There are things I want to do, to try, when it comes to expanding my jewelry making craft skills and I'll even go so far as to buy the items and books on how to do a particular skill, but then they'll sit on my shelf for months, collecting dust, calling my name, just begging me to use them. And I won't.  I'm too chicken.

I know it takes time to develop certain skills, to make my items look like what I see others (who have been doing the same thing I'm interested in, but they've been practicing for YEARS to get where they are) and I chicken out on even making the attempt.

The latest thing I'm wanting to learn is metal work. Stamping, firing, anything and everything. I look at all the blogs I follow and see those who have taken up metal working and how it's expanded their abilities and skills and I think, "Wow! I could so do that! It looks so easy I could just pick it right up!"  And, it's entirely likely that I could pick it right up. I'm not stupid or lacking in skills. I can read quite well (started reading in kindergarten where I grew up) and I'm not afraid to try new things.

What I am afraid of is failing.  But, failing is a good way to learn. Especially if you don't have classes you can attend.  Reading, following the written and pictoral directions, and making mistakes that you learn from is how you get good at something. If you (or, should I say "I") don't ever try, you/I won't learn and you/I won't improve to the point others are saying "That looks easy! Bet I could do that, too!"  By the way, making it look easy is the mark of a good craftsman/woman.

Well, this weekend I finally took a deep breath and took... not "the plunge" so much as a toe-dip in the water.  I'm working on a new lanyard to go with my Fishes & Loaves design and I'm working it in copper. I have copper wire, so that's no problem.  I also have copper necklace links if I want to go that route so, again, no problem.  What I don't have is copper headpins. 

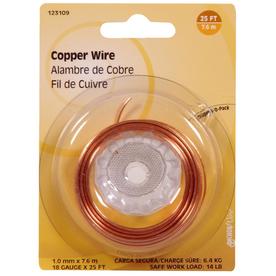
What I also have is a hand-held micro torch.  And it's loaded.  And I have the reloads if I need them.  And, I also have copper wire!  Real copper, not the copper-coated artistic wire, but the real thing (from Lowe's, if anyone's curious).  24 gauge.

I took another deep breath, cut several 3" pieces, flicked on my torch, picked up a piece in my special don't-get-burned! pliers and went to town.

AND IT WORKED!  WOO HOO!  YES!

I remembered that one blog I read said you should heat the whole wire length slightly, first, before attempting to create the ball at the end and I did that.  Then I remembered what someone else's article said about holding the wire so it pointed into the flame and I did that.  Then, on a whim, while holding the whole thing over a bowl of water (in case any of the wire decided to cut loose and fall) I rotated both hands so the flame was pointing up at the wire that I was holding into the flame.

Did you know copper, when it starts to ball up, will run UP from the flame?  It was totally cool to see!  Then, I also remembered what someone said about, if you want the head pins to have a rosy-pink look to them, you need to drop them in the water while they're glowing so I did that with several.

Here's just a few of the results so far:

Several copper headpins, work hardened, buffed and
ready to be used ~ EEEEEEE!

A closer look ~ you can see both "normal" copper headpins
and rose colored headpins


Once I realized I was ACTUALLY MAKING HEADPINS, much squealing and bouncing in the chair ensued.  I was fairly giddy over my success. 

I also quickly learned that annealed 24g copper wires is very, VERY soft and you want to work harden it with very, very gentle taps of your hammer before trying to get the fire scale off (very gentle, you don't want to flatten the wire, just re-harden it)

Also, I know you're supposed to pickle the wire after it's been cooled, but I didn't (and still don't) happen to have any pickle (I always think of Vlasic Dills when anyone says "pickle" and I know that's not what that means!) but I also remember reading (again!) that you can make your own pickle from household items. Does anyone remember or have that recipe? It's a LOT of work getting that scale off!

So, lesson learned. Don't just decide to try something new at the Expert end of the spectrum. Just because it LOOKS easy, it isn't. Those Experts have worked HARD to get where they are. Take the small steps, first. Make those copper headpins. Once you/I are/am comfortable with that (and have made several dozen! EEEEEEE!) then move on to the next level.  It isn't sink or swim, it's get in slowly and work up to that Freestyle stroke!

p.s., once again I forgot the date/time for a Hop I signed up for, the UK Inspiration Challenge. (sigh) I think I'm going to quit signing up for hops and simply try to make the challenge of each hop a personal goal. That is, I'll set myself the challenge to create whatever the hop is for, but not sign up. I think it's sad when someone signs up for a challenge, then doesn't "show up" for it (as it were). Guess I'm just a sad, sad person this last couple of months! :(  Be that as it may, you should go visit the sites of those who DID "show up" for this interesting challenge:
The HostsLesley Watt Gossiping Goddess

Rebecca Anderson Songbeads

Pippa Chandler Pip's Jewellery

Teresa Hulley Bo Hulley Beads

Natalie McKenna Grubbi


Dorset


Ginger Bishop Lilmummylikes

Cece Cormier The Beading Yogini

Therese Frank Therese’s Treasures

Cilla Watkins Tell Your Girlfriends

Sherry Baun


Edinburgh

Therese Frank Therese’s Treasures

Kashmira Patel Sadafulee

Caroline Dewison Blueberribeads

Sherry Baun

Leigh Thow Jewellrleigh

Lucy Haslam

Bath


Sherry Baun

Isle of Wight

Duane Clark Bizzy Bead

Sharyl McMillian-Nelson Sharyl's Jewelry

Leigh Thow Jewellrleigh

Jean Wright Just Beadey

D Lynne Bowland Islandgirl’s Insights


Sherry Baun

Liverpool


Shalini Austin Jewellery by Shalini

Doris Stumpf Glaszwerg

Sherry Baun

Lennis C Windbent

Southampton

Sherri Stokey Knot Just Macramé

Sherry Baun

Leigh Thow Jewellrleigh

Kathy Lindemer Bay Moon Design


Thursday, November 8, 2012

And The Winner Is.......

The Magic Frog has spoken! 

(drumroll, please!)


Renetha, contact me with your
snail-mail info!

HOW-SOME-EVER!

The Magic Frog decided ONE winner was not enough!  Before I could so much as squeak, he reached back into the winner bowl and pulled out another name:

(another drumroll, please:)


Jeweled Inspirations, you also need
to contact me with your snail-mail info
So, that's the drawing for this month. Not to worry, Beading Magazine coveters, I will be having another drawing and give-away next month.  I have a LOT of magazines (I get my hoarding instincts from Frugal Father) and I doubt I'm going to run out of 'zines to share any time soon.

Check back, there's another give-away coming.
Renetha, Jeweled Inspirations, be sure to contact me via my email!
And, thank all of you for playing along.  Come back for the next one ;)

Wednesday, November 7, 2012

Destash Drawing & Magic Frogs

Today is your last chance to sign up for the First Magazine Destash Give-Away.  The Magic Frog will be drawing the name of the 1st winner tonight so hurry up and comment to be entered. Also, be SURE you leave a name if you don't have a blog and a way to reach you so I can notify whomever wins.

Ruby "helps" the Magic Frog choose the winner.....


Tuesday, November 6, 2012

New Jewelry and Ideas

I saw an awesome pair of rustic hoop earrings with what looked like a sea-glass bead dangle. They were hoops where the ends crossed each other and the creator wired the ends and used that to created the loop for the ear wires to dangle from.  I loved them and now I can't find them to share the link and photo! Darn it!  Because I wanted to share where my inspiration for these earrings came from and give credit where due. If I refind them, I'll update this and link to her site!
Anyway, as I said, I really liked what she'd done and tho't I'd see if I could duplicate it and make myself a pair.
Bad idea.  Well, bad in that I'm not great with wire work. GOOD idea in that the following pairs (and ideas) came about from my flubbing of the wire. (snork).  I decided if I couldn't get them go round then I jolly well would make a FISH shape out of them!  And that ended up looking like the Christian fish symbol which made me think of the story in the New Testament of Jesus feeding the 5,000 with a little boy's donated lunch of just 5 loaves of bread and 2 fish.
Thus emerged the earrings named Fishes & Loaves.  Here are the earrings:

this is the "large" pair - 3"


the "small" pair ~ 2" (and not as
deeply hammered)

Then I started thinking of other ways I could use the fish and loaves idea.  A lanyard:


...also, a necklace involving some leather and wire-wrapped "loaves", but I haven't drawn that one out, yet. It's still floating about in my head.... Oh, man, sorry about the pun! (no, I'm not!)

Anyway, that's what's up for today (besides the voting-thing... can't have Ruby mad at me... you can't afford it, either, so go vote!)

Voting Reminder From Ruby

Ruby would like to remind everyone to get out and exercise their right to vote.  Someone paid the price so you could have that freedom, don't squander it!

...and, remember, if you DON'T exercise your right to vote? You don't GET to exercise your right to complain for the next four years!
Just sayin'!

Saturday, November 3, 2012

Destash Contest

I love magazines.  I go to the nearest Barnes & Noble at least every few weeks and dig through the magazine rack for anything for beads and jewelry and, lately, photography.  However, I'm also something of a pack rat. I have a difficult time getting rid of anything. 
BUT!
I have made a DECISION! (yes, it's deserving of capital letters, makes it much more impressive) The decision is a give-away.  I have a whole BUNCH of magazines ~ bead magazines, wire magazines, lapidary magazines, photography magazines ~ and I am going to have a series of give-aways for all these magazines over the next several months (yes, I have that many and, yes, I'll very likely get even more!)
Here's a peek at the ones I have so far:


So... Make a comment, tell me which magazines are your favs, or which you might want to try, and why.  All the names of those who comment will get tossed in the hat and the magical frog will pick the name of the first winner!