Don't forget, folks, I have a contest going on for the month of March. You only have two weeks left to participate then I'm drawing the winners. Go here to join in and be entered in the drawing!
Beading, crocheting, clay-making, writing, opinionating... two sisters who do it all!
Translate
Monday, March 19, 2012
Friday, March 16, 2012
What I'm Up To... Not Much
It's been busy at work this week (got a new system being rolled out) plus our church choir is starting practice for our Easter cantata. Too tired at the end of the day to do more than flip on a light and look at my table before flipping the light back out. Still, I have time to wander through the blogs I stalk follow and get ideas.
They make my fingers itch because I want to try them out!
In fact, I saw one earlier this week where a lady had made a pair of earrings where she'd looped the wires in an interesting way. I can't, for the life of me, find that blog now (and, if I do later, I'll link to it!) so I can't show you what she did (darn it!) but I can show you a little of the influence she had on me. I went home last night and played a bit with my copper wire. Made a couple pairs of earrings and something else I'm pondering making into a necklace focal... we'll see... we'll see...
Now, the copper wire I used isn't craft wire. Oh, no! This is bought-it-at-Lowe's 18gauge copper wire! It's all bright and shiny and just as easy to work with as the stuff you buy in the craft store. Like I said, I made a couple of pairs of earrings but, because I'm at work and only have my iPhone right now, I only have the pair I decided to wear today (I'm keeping these for myself). Here's a couple of pics. Yeah, I left the wire shiny but that's because I don't play with the stuff all you amazing wire and metal smiths play with. I've read about a couple of ways to patina that don't involve liver of sulfer so I may try that on a later set of wires. Until then, :)
They make my fingers itch because I want to try them out!
In fact, I saw one earlier this week where a lady had made a pair of earrings where she'd looped the wires in an interesting way. I can't, for the life of me, find that blog now (and, if I do later, I'll link to it!) so I can't show you what she did (darn it!) but I can show you a little of the influence she had on me. I went home last night and played a bit with my copper wire. Made a couple pairs of earrings and something else I'm pondering making into a necklace focal... we'll see... we'll see...
Now, the copper wire I used isn't craft wire. Oh, no! This is bought-it-at-Lowe's 18gauge copper wire! It's all bright and shiny and just as easy to work with as the stuff you buy in the craft store. Like I said, I made a couple of pairs of earrings but, because I'm at work and only have my iPhone right now, I only have the pair I decided to wear today (I'm keeping these for myself). Here's a couple of pics. Yeah, I left the wire shiny but that's because I don't play with the stuff all you amazing wire and metal smiths play with. I've read about a couple of ways to patina that don't involve liver of sulfer so I may try that on a later set of wires. Until then, :)
| Decided to use the Pantone suggested tangerine. It's a "see-thru" bead so the color doesn't photograph as bright as it really is. Very nice. |
| See? Looks more red than tangerine, but I swear it's tangerine! |
| Silver & copper... I dunno, but I don't have any copper ear wires. Guess I'll have to buy that Renaissance wax to use on future copper wire jobs. |
Monday, March 12, 2012
Spring Challenge by Michelle Mach
To Enter My March Contest, go HERE:
Well, I joined Michelle's challenge again. Maybe it's because I suddenly like blue. Or maybe I just can't resist the shiny (I've mentioned my ADOS before). Whatever the reason, I bought the bracelet she dared us to remake. As always, I forgot to take the before picture, so I went back to her site and stole the original pic from her:
I had no real trouble using the crystals but, for some reason, couldn't come up with a way to use the silver spacers so they're tucked into my stash to await the perfect reworked job. Until then, here are my two contributions to the challenge:
And here are the others participating in the hop. Don't forget to check out what they've done, too!
Michelle - Beads & Books [Hostess]
Andrew - The Writing & Art of Andrew Thornton
Christa - Adventures of One Beady Woman
Dita - Alankarshilpa
Donetta - Simply Gorgeous
Erin - Erin Siegel Jewelry
Heather - As I Bead It
Jean - Snap Out of It Jean - There's Beading to Be Done!
Karen - Over the Moon Design
Kate - We Can Make That At Home
Kay - Palm Coast Art
Kim - CianciBlue
Kristina - Wild Roses and Blackberries
Linda - Lindy's Designs
Lisa - Pine Ridge Treasures
Marlene - Amazing Designs by Marlene
Michelle - Reverie & Revival
Pam - The Crazy Creative Corner ~ you are here
Pamela - Someday Beads
Renetha - Lamplight Crafts
Sharyl - Catchenthesun
Terry - Pink Chapeau Vintage Jewelry
Therese - Therese's Treasures
Well, I joined Michelle's challenge again. Maybe it's because I suddenly like blue. Or maybe I just can't resist the shiny (I've mentioned my ADOS before). Whatever the reason, I bought the bracelet she dared us to remake. As always, I forgot to take the before picture, so I went back to her site and stole the original pic from her:
I had no real trouble using the crystals but, for some reason, couldn't come up with a way to use the silver spacers so they're tucked into my stash to await the perfect reworked job. Until then, here are my two contributions to the challenge:
| I started with a lanyard (instead of a regular necklace) It's titled "Hot Spring" and is for sale in my Etsy store |
| I used the yellow dyed agate for Spina Bifida Awareness and the cross to remind us to have faith in God's plans for our lives |
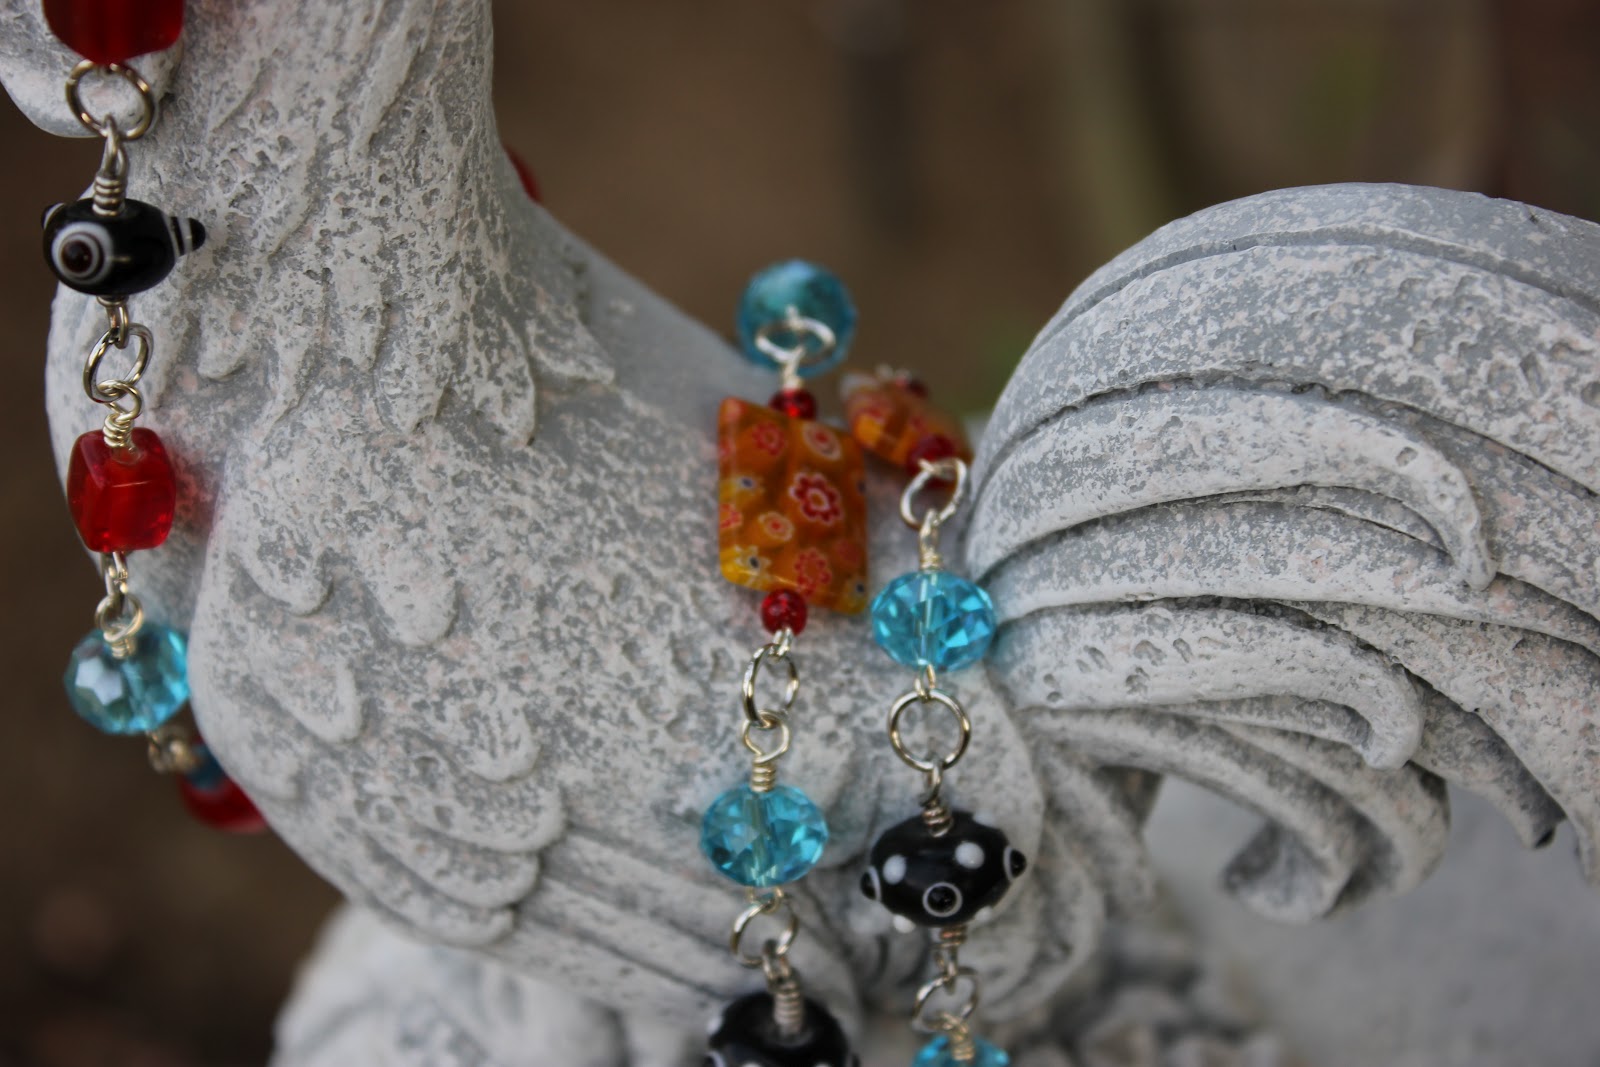
| Red glass beads, red & yellow millifiore glass rectangles and black lampwork with white and purple dots accent the blue crystal rondelles from Michelle's challenge. |
| This one I used gunmetal links and wire as well as yellow fritted lampwork beads and green dyed agate that reminded me of a Japanese painting whose colors ran together. |
| Yellow dyed agate finishes the bracelet at either end. This piece isn't titled, yet, but will be in my shop soon also under the Spina Bifida line. |
And here are the others participating in the hop. Don't forget to check out what they've done, too!
Michelle - Beads & Books [Hostess]
Andrew - The Writing & Art of Andrew Thornton
Christa - Adventures of One Beady Woman
Dita - Alankarshilpa
Donetta - Simply Gorgeous
Erin - Erin Siegel Jewelry
Heather - As I Bead It
Jean - Snap Out of It Jean - There's Beading to Be Done!
Karen - Over the Moon Design
Kate - We Can Make That At Home
Kay - Palm Coast Art
Kim - CianciBlue
Kristina - Wild Roses and Blackberries
Linda - Lindy's Designs
Lisa - Pine Ridge Treasures
Marlene - Amazing Designs by Marlene
Michelle - Reverie & Revival
Pam - The Crazy Creative Corner ~ you are here
Pamela - Someday Beads
Renetha - Lamplight Crafts
Sharyl - Catchenthesun
Terry - Pink Chapeau Vintage Jewelry
Therese - Therese's Treasures
Saturday, March 10, 2012
Playing In Mom's Back Yard
(to enter my March Contest go HERE:)
I love my new camera (the one mentioned right after Christmas?). I took it when we went with our school to the Ronald Reagan Library and, while you can take pics in the Library, you can't use flash. I have a setting for this on my new Canon Tsi Rebel. It gathers whatever ambient light there is and enhances it. Take a short peek:
And now, some pics from my mother's back yard: (I used the bigger lens from the patio):
So, that's it for today. I'll be back later with my pics for Michelle Mach's Blog Hop this Tuesday. She challenged us to reuse a bead bracelet of beautiful teal crystal rondelles and crystal spacers. I managed to use the rondelles but not the spacers. I'll be saving those for something else.
Have a great rest of the weekend.
Oh, p.s., go here to read Cindy of Sweet Bead Studio's blog about a new pic-editing web-site called PicMonkey (heee... monkeys!) Anyway, I loved it. Between it and Windows Live Photo Editing I'm going to have a lot of fun with my pictures.
I love my new camera (the one mentioned right after Christmas?). I took it when we went with our school to the Ronald Reagan Library and, while you can take pics in the Library, you can't use flash. I have a setting for this on my new Canon Tsi Rebel. It gathers whatever ambient light there is and enhances it. Take a short peek:
![]() |
| In the hallway outside the reproduction of the Oval Office I loved ol' Reagan. (very, very dim light.) |
![]() |
| A sobering reminder (even tho' it was after Regan) Never, ever forget. |
![]() |
| Guess what this portrait is made from? Hint: Reagan *loved* them! That's right, 10,000 Jelly Bellys! |
![]() |
| Lemon Tree Birdhouse |
![]() |
| Rustic Pedestal |
![]() |
| only glad this rooster doesn't crow! |
Have a great rest of the weekend.
Oh, p.s., go here to read Cindy of Sweet Bead Studio's blog about a new pic-editing web-site called PicMonkey (heee... monkeys!) Anyway, I loved it. Between it and Windows Live Photo Editing I'm going to have a lot of fun with my pictures.
Thursday, March 8, 2012
POCKET SALES or How To Have A Mini-Show
I was wanting to find a way to advertise the lanyards I'm working on and a friend of mine is selling at her office for me and I didn't want it to be something bulky or space consuming. What to do, what to do?
Then the Idea Fairybashed me over the head with her stick waved her wand over my head and the light dawned! Digital Photo Frames!! I could get one, load an SD card with pics of my wares (even my necklaces & earrings!) and Witchie-Poo (the friend I mentioned) could set it on her desk for their viewing pleasure (and, hopefully, buying pleasure!).
Then I tho't (swiftly ducking thatstick wand as it swung at me a 2nd time) it would be a grand idea to be able to carry my wares wherever I go. Except, that's a lot bulky! Even carrying a Digital Photo Frame is bulky (and you tend to get strange looks from passersby). So I went on Amazon.com and plugged in "Digital Photo Frames" (pun fully intended!) and up came all sorts of great answers. Below are pics of the two answers I bought. The first one, by Coby, holds more pics (160) than the 2nd one by Micca (60-70) so I'm going to be doing a swap after I edit a few more pics.
Now, you may have to do some cropping, these screens are only 2.4" each so it only fits so much of the shot in. Group your items and don't go too macro on them or you'll be cropping out a lot of what you're trying to show. And make sure that grouping includes any text you add to the picture (like the price and title of the piece). But, these puppies fit great in a purse or pocket and you can whip them out to show someone if you're discussing your jewelry making and they mention they'd like to see what you do. I mean, a business card with your web addy is fine, but how often do they get dropped in a purse and forgotten or even lost? Give 'em the card, by all means, but this is a great little advertising tool we could all adapt for those "What kind of jewelry do you make?" moments where it's easier to show than tell.
And it will make a much more lasting impression.
Then the Idea Fairy
Then I tho't (swiftly ducking that
Now, you may have to do some cropping, these screens are only 2.4" each so it only fits so much of the shot in. Group your items and don't go too macro on them or you'll be cropping out a lot of what you're trying to show. And make sure that grouping includes any text you add to the picture (like the price and title of the piece). But, these puppies fit great in a purse or pocket and you can whip them out to show someone if you're discussing your jewelry making and they mention they'd like to see what you do. I mean, a business card with your web addy is fine, but how often do they get dropped in a purse and forgotten or even lost? Give 'em the card, by all means, but this is a great little advertising tool we could all adapt for those "What kind of jewelry do you make?" moments where it's easier to show than tell.
And it will make a much more lasting impression.
![]() |
| The Coby Digital 2.4" Photo Album |
![]() |
| Has a stand to rest on, side, back, or upright |
![]() |
| Easy to use, pics can go vertical or horizontal |
![]() |
| Micca 2.4" screen Digital Album |
![]() |
| Only holds 60 or so pics but they're very clear |
![]() |
| Vertical or Horizontal direction - more of a wallet style than a desktop model |
Sunday, March 4, 2012
LITTLE BIT BUSY WEEKEND
So, I finally got my hands into my poly-clay! I'm a little bit of a nervous nelly so I started off with the box of "starter" clays Saner Sister bought for my B-day back in January (yes, I know... don't ask how long the other clays have been sitting around, waiting for me to open them!) ANYway, I opened these little packets of clay about 3"x2" and, taking a deep breath, cut a small portion from three; red, olive green (both visible in saran wrap) and a sparkly gold (not in view). These were either a little old or not from good stock so I had to put a few drops of clay softener on them but, after that, and a few (okay, LOT) of runs thru the pasta machine, they came out usable. I made 5 beads that were a mix of the red, green and gold with the red dominating (I forgot to take pics after baking and before making a necklace). I also made several petal shaped cut outs of marbled pink and black. That mix was an accident but a happy one! (no pics of that one, yet). Anyway, here's the necklace and earrings I made from the beads. The flower is from another necklace I bought recently but couldn't wear (I love repurposing!) and the green rounds are from Michael's. The earrings are hanging from the necklace to your right. I decided to go for a slightly Oriental look with this design, hence the chain dangles below the earrings and the bead under the flower. I wish the shot showed the colors better in the larger red beads, but the earrings show the gold pretty well. The green and gold turned into accents after several turns thru the pasta machine. I showed Saner Sister, because I was so tickled by what I'd done, and she said how it would go SO well with the outfit she was wearing for church on Sunday. (sigh) Well, I haven't made her any jewelry in awhile, so I let her have it.
Now, about the wineglass tabs I mentioned in my last post, here's a few shots:
![]() |
| octopi at the bottom right, bowl shapes in the center word tabs, bead flowers |
![]() |
| the word tabs.. I call them "flirts" (heee) |
![]() |
| The octopus gang! Only have one of each of these so they'll likely end up as charms. |
![]() |
| flower beads |
![]() |
| Glass bowls |
| My use of the blue glass bowls as shown in a previous post |
Get designing!
Friday, March 2, 2012
I LOVE (making) EARRINGS
Okay, so, I played around a few minutes last night (was a busy day!) with some glass wineglass tabs I bought over at Pier1 Imports. I'm telling you, folks, they have some great glass keepers/tabs that can be repurposed for earrings or bracelet charms or whatEVer you can come up with. I went with simple since I'm just an earring making fiend right now.
These keeper/tabs are glass and look a bit like a bowl so I decided to put a couple of hot pink, pressed glass "stone" dangles on them. Simple. Easy (as long as I don't over-pressure the pressed glass beads). Cute! Tell me what you think?
(Oh, and, I'll be putting up pics of some of the other glass keeper/tabs in the next few days. I'll have a bit of a contest with them and see if anyone's interested in winning something, hey?

These keeper/tabs are glass and look a bit like a bowl so I decided to put a couple of hot pink, pressed glass "stone" dangles on them. Simple. Easy (as long as I don't over-pressure the pressed glass beads). Cute! Tell me what you think?
(Oh, and, I'll be putting up pics of some of the other glass keeper/tabs in the next few days. I'll have a bit of a contest with them and see if anyone's interested in winning something, hey?
Subscribe to:
Posts (Atom)